Personalized Introduction
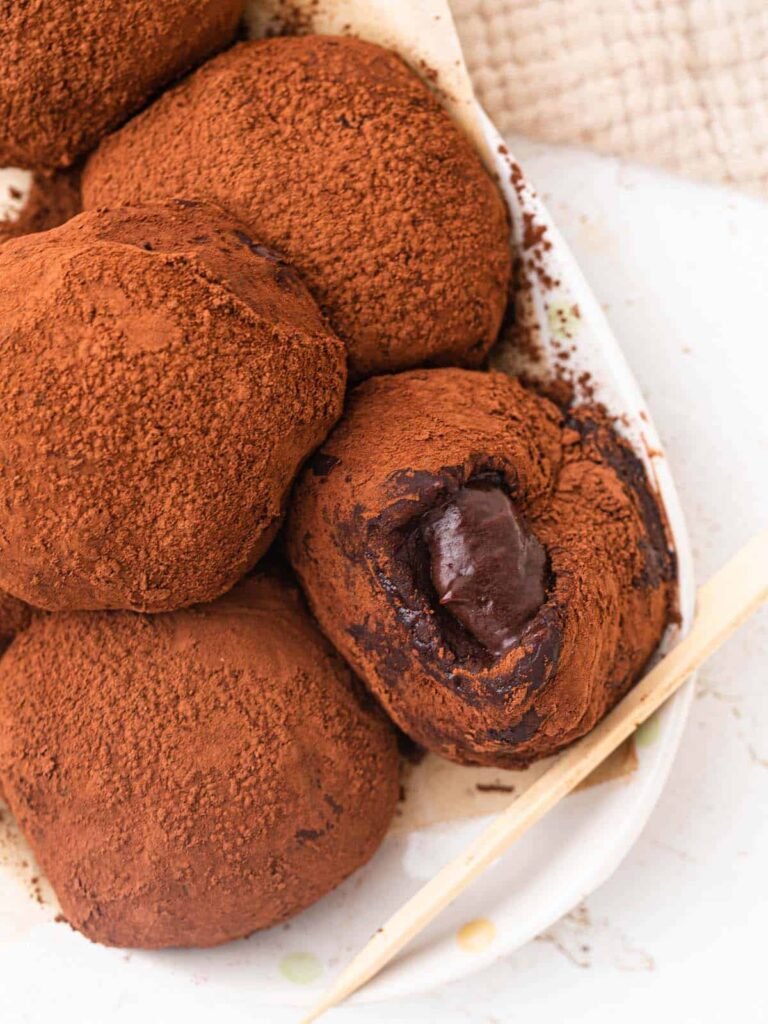
If you’ve never tried homemade Chocolate Mochi before, you’re in for a truly delightful treat. The first time I made it, I was fascinated by its unique texture. It wasn’t quite like cake, brownies, or cookies. Instead, it was wonderfully soft, slightly chewy, and packed with rich chocolate flavor. After just one bite, I knew this recipe would become one of my favorite desserts to make whenever I wanted something a little different.
What I love most about Chocolate Mochi is how it combines the comforting taste of chocolate with the fun, springy texture that makes mochi so special. It feels both familiar and exciting at the same time. Whether you’re making it for a family gathering, afternoon tea, or simply because you’re craving chocolate, this recipe is surprisingly easy and incredibly rewarding.
The best part is that you don’t need advanced baking skills to make it. With a handful of pantry ingredients and a little mixing, you’ll have a delicious dessert that’s naturally gluten-free and guaranteed to impress anyone who takes a bite. Let’s get started!
Recipe Origin & Story
Mochi has been enjoyed in Japan for centuries and is traditionally made from glutinous rice, also known as sweet rice. Its signature chewy texture has made it a beloved part of Japanese celebrations, holidays, and everyday treats. While classic mochi is often filled with sweet bean paste, modern versions have evolved to include everything from fruit and ice cream to chocolate.
Chocolate Mochi, especially the baked version made with glutinous rice flour, has become popular around the world because it blends traditional Japanese ingredients with familiar dessert flavors. It’s the perfect fusion of East and West, combining rich cocoa with the irresistible chewiness that makes mochi unique.
I first discovered baked chocolate mochi at a neighborhood bakery, and I couldn’t believe how satisfying every bite was. Ever since then, I’ve loved recreating it at home, experimenting with different chocolates and toppings to make each batch a little different.
Ingredient Spotlight
- Main Star: Glutinous rice flour (often labeled sweet rice flour or mochiko) creates the wonderfully chewy texture that makes mochi so unique.
- Secret Boost: A teaspoon of espresso powder deepens the chocolate flavor without making the dessert taste like coffee. A splash of vanilla extract adds warmth and richness.
- Quality Tips: Choose good-quality unsweetened cocoa powder and fresh glutinous rice flour for the best texture. If using chocolate chips, select semi-sweet or dark chocolate for a richer flavor.
Nutritional Benefits
Chocolate Mochi is certainly a dessert, but it also contains ingredients that offer a few nutritional benefits. Cocoa powder provides antioxidants known as flavonoids, which help protect your body’s cells from everyday stress. Using dark chocolate can also contribute small amounts of iron and magnesium.
Glutinous rice flour provides carbohydrates that give your body energy, while milk adds calcium and protein. Since this dessert is naturally gluten-free when made with certified gluten-free ingredients, it’s a wonderful option for many people who avoid wheat.
As with any sweet treat, Chocolate Mochi is best enjoyed in moderation as part of a balanced diet.
Adaptable Variations
- Dietary Swaps: Replace dairy milk with almond, oat, or coconut milk for a dairy-free version. Use dairy-free chocolate chips to make the recipe completely vegan.
- Flavor Twists: Mix in chopped hazelnuts, toasted coconut, peanut butter chips, white chocolate chips, or swirl in a little Nutella before baking.
- Seasonal Spins: During autumn, add pumpkin spice. Winter pairs beautifully with peppermint extract, while spring and summer are perfect for fresh raspberries or strawberries served alongside each slice.
Cooking Science Explained
Chocolate Mochi has an unusual texture because of a few fascinating baking reactions.
Why use glutinous rice flour? Despite its name, it doesn’t contain gluten. Instead, it’s rich in starches that create mochi’s signature chewy texture.
Why doesn’t it rise like cake? Mochi isn’t designed to become fluffy. Instead, the starches gelatinize during baking, giving it a soft, pleasantly chewy consistency.
Why let it cool before slicing? Cooling allows the starches to set completely, making each piece easier to cut while improving the overall texture.
Easy, Step-by-Step Recipe
Ingredients
- 2 cups (320g) glutinous rice flour (mochiko)
- ½ cup (50g) unsweetened cocoa powder
- 1½ cups (300g) granulated sugar
- 2 teaspoons baking powder
- ¼ teaspoon salt
- 2 cups (480ml) whole milk
- 2 large eggs
- ½ cup (115g) unsalted butter, melted
- 1 teaspoon vanilla extract
- 1 teaspoon espresso powder (optional)
- 1 cup semi-sweet chocolate chips
- Powdered sugar for dusting (optional)
Instructions
- Preheat your oven to 350°F (175°C). Lightly grease an 8×8-inch baking dish.
- In a large bowl, whisk together the glutinous rice flour, cocoa powder, sugar, baking powder, salt, and espresso powder if using.
- In a separate bowl, whisk together the milk, eggs, melted butter, and vanilla extract.
- Gradually pour the wet ingredients into the dry ingredients while whisking until smooth.
- Fold in the chocolate chips.
- Pour the batter into the prepared baking dish and spread it evenly.
- Bake for 50–60 minutes, or until the center is set and a toothpick inserted comes out mostly clean.
- Allow the mochi to cool completely in the pan.
- Slice into squares or rectangles.
- Dust lightly with powdered sugar if desired and serve.
Practical & Valuable Tips
- Storage: Store Chocolate Mochi in an airtight container at room temperature for up to two days or refrigerate for up to five days.
- Serving Ideas: Enjoy it with vanilla ice cream, whipped cream, fresh berries, or a drizzle of chocolate sauce for an extra-special dessert.
- Substitutions: Dark chocolate chips, milk chocolate, or chopped chocolate bars all work beautifully depending on your preferred sweetness level.
Make-Ahead & Batch-Cooking
Chocolate Mochi is an excellent make-ahead dessert because its chewy texture stays delicious for several days. Bake it the day before serving, allow it to cool completely, then store it in an airtight container. Many people even find that the texture becomes slightly chewier after resting overnight.
If refrigerated, let the mochi sit at room temperature for about 20 minutes before serving so it softens slightly. You can also warm individual pieces in the microwave for 10–15 seconds for a freshly baked feel.
Eco-Friendly Kitchen Hacks
- Use reusable silicone baking mats or grease the baking dish instead of disposable parchment paper.
- Store leftovers in reusable glass containers.
- Measure ingredients carefully to reduce food waste.
- Use leftover cocoa powder in smoothies or homemade hot chocolate.
- Bake multiple desserts while the oven is already hot to save energy.
Pairing Suggestions
- Beverages: Hot coffee, espresso, green tea, matcha latte, hot chocolate, or cold milk all pair beautifully with Chocolate Mochi.
- Sides & Sauces: Fresh strawberries, raspberries, vanilla ice cream, whipped cream, chocolate ganache, caramel sauce, or toasted coconut complement the dessert wonderfully.
Frequently Asked Questions
- Is glutinous rice flour the same as regular rice flour?
No. Glutinous rice flour has much more starch, creating the chewy texture that regular rice flour cannot achieve. - Can I freeze Chocolate Mochi?
Yes. Wrap individual slices tightly and freeze for up to two months. Thaw at room temperature before serving. - Why is my mochi too firm?
Overbaking can make the texture firmer than intended. Bake only until the center is set. - Can I add other mix-ins?
Absolutely! Chopped nuts, coconut flakes, peanut butter chips, or dried fruit all make delicious additions.
Call to Action
I hope this Chocolate Mochi becomes one of your favorite homemade desserts. It’s rich, chewy, wonderfully chocolatey, and unlike anything else you may have baked before. Whether you’re sharing it with family, serving it at a gathering, or enjoying a quiet afternoon treat with a cup of tea, it’s sure to leave everyone asking for another piece.
If you try this recipe, I’d love to hear how it turned out! Leave a comment below with your favorite chocolate variation or creative topping, and don’t forget to share a photo on social media. Your delicious creations inspire home bakers everywhere, and I can’t wait to see your version!
Bonus: Your Kitchen Notes
Every baker adds a personal touch to a recipe, and that’s what makes baking so rewarding. Use this section in your WordPress editor to record your favorite chocolate brand, mix-ins, baking time adjustments, or serving ideas. Maybe you discovered that dark chocolate chips create an even richer flavor, or perhaps you served your Chocolate Mochi with matcha ice cream for a unique twist. These personal notes will help you perfect your signature version and inspire readers to create their own delicious memories.