<h2 style=”color: #d33;”>Personalized Introduction</h2>
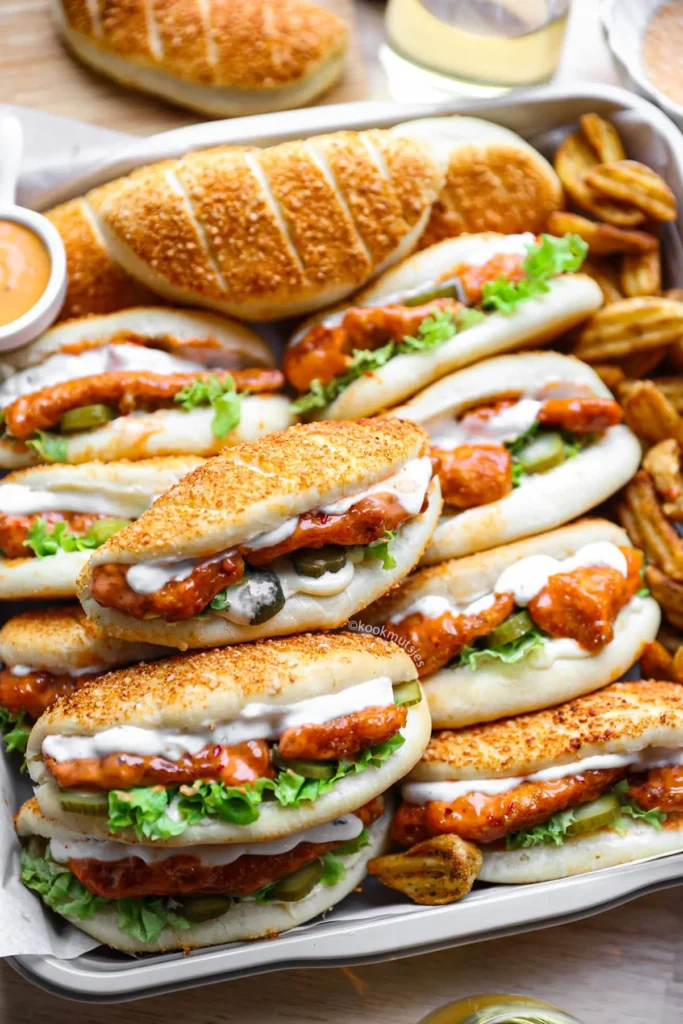
<p>If you’re anything like me, you can never say no to warm, fluffy bread filled with melty cheese and a creamy, slightly spicy chicken filling. These Cheesy Dynamite Chicken Buns are one of those recipes that disappear almost as quickly as they come out of the oven. They combine soft golden bread, juicy chicken, gooey mozzarella, and a bold dynamite sauce that delivers just the right amount of heat without overpowering the dish.</p>
<p>I first made these buns when I wanted something more exciting than ordinary sandwiches for a family movie night. I had leftover cooked chicken in the refrigerator, a little mozzarella cheese, and a bottle of chili sauce waiting to be used. After wrapping everything inside homemade dough and baking until golden, the kitchen smelled incredible—and everyone immediately asked when I’d be making them again.</p>
<p>Whether you’re preparing lunch, dinner, party snacks, or meal prep for the week, these cheesy stuffed buns are guaranteed to become one of your most requested recipes.</p>
<h2 style=”color: #d33;”>Recipe Origin & Story</h2>
<p>Stuffed bread has long been a favorite comfort food in many cultures, from savory pastries and baked rolls to stuffed buns filled with meats, vegetables, and cheese. As spicy “dynamite” sauces gained popularity in restaurants, home cooks began incorporating those creamy, sweet, and spicy flavors into sandwiches, wraps, and baked breads.</p>
<p>This recipe combines fluffy homemade bread with a creamy chicken filling inspired by dynamite sauce—a delicious blend of mayonnaise, sweet chili sauce, and hot sauce. The addition of melted mozzarella makes every bite rich, satisfying, and wonderfully cheesy.</p>
<p>For me, these buns represent everything I love about homemade comfort food: simple ingredients transformed into something warm, flavorful, and perfect for sharing.</p>
<h2 style=”color: #d33;”>Ingredient Spotlight</h2>
<ul>
<li><strong>Main Star:</strong> Tender shredded chicken creates a hearty filling that absorbs the creamy dynamite sauce beautifully.</li>
<li><strong>Secret Boost:</strong> A little smoked paprika and garlic powder add extra depth while mozzarella cheese creates the irresistible gooey center.</li>
<li><strong>Quality Tips:</strong> Use freshly shredded rotisserie chicken or homemade cooked chicken, grate your own mozzarella for better melting, and choose a soft bread flour for extra fluffy buns.</li>
</ul>
<h2 style=”color: #d33;”>Nutritional Benefits</h2>
<p>Chicken is an excellent source of lean protein, helping keep you full and energized. It also provides important nutrients like niacin, phosphorus, and vitamin B6.</p>
<p>Mozzarella cheese contributes calcium and protein, while green onions and parsley add freshness along with vitamins and antioxidants. Making these buns at home allows you to adjust the spice level, reduce sodium, and choose fresh ingredients without unnecessary preservatives.</p>
<p>Served alongside a fresh salad or vegetables, these buns become a satisfying and balanced meal.</p>
<h2 style=”color: #d33;”>Adaptable Variations</h2>
<ul>
<li><strong>Dietary Swaps:</strong> Use gluten-free bread dough for a gluten-free version, dairy-free mozzarella for a dairy-free option, or substitute cooked turkey for the chicken.</li>
<li><strong>Flavor Twists:</strong> Add jalapeños, sautéed mushrooms, corn, diced bell peppers, crispy bacon, caramelized onions, or chopped spinach to the filling.</li>
<li><strong>Seasonal Spins:</strong> In summer, add roasted peppers and fresh herbs. Autumn pairs beautifully with smoked cheddar, winter welcomes extra spice, while spring tastes wonderful with spinach and fresh parsley.</li>
</ul>
<h2 style=”color: #d33;”>Cooking Science Explained</h2>
<p>A few simple baking techniques help create perfectly soft buns with a delicious cheesy filling.</p>
<p><strong>Why let the dough rise?</strong> Yeast produces tiny air bubbles that give the bread its light, fluffy texture.</p>
<p><strong>Why seal the buns tightly?</strong> Properly sealing the edges keeps the cheese and creamy filling from leaking while baking.</p>
<p><strong>Why brush with egg wash?</strong> The egg creates a beautiful shiny golden crust while helping toppings like sesame seeds stick.</p>
<h2 style=”color: #d33;”>Easy, Step-by-Step Recipe</h2>
<h3 style=”color: #d33;”>Ingredients</h3>
<h4>For the Dough</h4>
<ul>
<li>3½ cups (440g) bread flour</li>
<li>2¼ teaspoons active dry yeast</li>
<li>1 tablespoon sugar</li>
<li>1 teaspoon salt</li>
<li>1 cup (240ml) warm milk</li>
<li>2 tablespoons unsalted butter, melted</li>
<li>1 large egg</li>
</ul>
<h4>For the Filling</h4>
<ul>
<li>2 cups cooked shredded chicken</li>
<li>1 cup shredded mozzarella cheese</li>
<li>¼ cup mayonnaise</li>
<li>3 tablespoons sweet chili sauce</li>
<li>1 tablespoon Sriracha (adjust to taste)</li>
<li>1 teaspoon garlic powder</li>
<li>½ teaspoon smoked paprika</li>
<li>¼ teaspoon black pepper</li>
<li>2 tablespoons chopped green onions</li>
</ul>
<h4>For Topping</h4>
<ul>
<li>1 beaten egg (egg wash)</li>
<li>Sesame seeds (optional)</li>
<li>Fresh parsley, chopped</li>
</ul>
<h3 style=”color: #d33;”>Instructions</h3>
<ol>
<li>In a large bowl, combine the warm milk, sugar, and yeast. Let it sit for 5–10 minutes until foamy.</li>
<li>Add the melted butter, egg, flour, and salt. Mix until a soft dough forms.</li>
<li>Knead the dough for 8–10 minutes until smooth and elastic.</li>
<li>Place the dough in a lightly greased bowl, cover, and let it rise for about 1 hour or until doubled in size.</li>
<li>Meanwhile, mix the shredded chicken, mozzarella, mayonnaise, sweet chili sauce, Sriracha, garlic powder, smoked paprika, black pepper, and green onions.</li>
<li>Punch down the risen dough and divide it into 10–12 equal portions.</li>
<li>Flatten each piece into a circle and place a generous spoonful of filling in the center.</li>
<li>Fold the dough around the filling and pinch the edges tightly to seal.</li>
<li>Arrange the buns seam-side down on a parchment-lined baking tray.</li>
<li>Cover loosely and let them rise for another 20–30 minutes.</li>
<li>Brush each bun with egg wash and sprinkle with sesame seeds if desired.</li>
<li>Bake at 375°F (190°C) for 18–22 minutes until beautifully golden brown.</li>
<li>Cool slightly, garnish with fresh parsley, and serve warm while the cheese is wonderfully gooey.</li>
</ol>
<h2 style=”color: #d33;”>Practical & Valuable Tips</h2>
<ul>
<li><strong>Storage:</strong> Store cooled buns in an airtight container in the refrigerator for up to four days.</li>
<li><strong>Serving Ideas:</strong> Pair with fries, potato wedges, coleslaw, soup, or a crisp green salad.</li>
<li><strong>Substitutions:</strong> Cheddar, Monterey Jack, or Pepper Jack cheese all work beautifully in place of mozzarella.</li>
</ul>
<h2 style=”color: #d33;”>Make-Ahead & Batch-Cooking</h2>
<p>These buns freeze wonderfully. Assemble them before baking, freeze on a tray until firm, then transfer to freezer bags for up to three months.</p>
<p>When ready to enjoy, thaw overnight in the refrigerator, let them come to room temperature while the oven preheats, then bake as directed. Already baked buns also reheat beautifully in the oven or air fryer.</p>
<h2 style=”color: #d33;”>Eco-Friendly Kitchen Hacks</h2>
<ul>
<li>Use leftover roasted or rotisserie chicken to reduce food waste.</li>
<li>Store extra buns in reusable freezer bags or containers.</li>
<li>Save herb stems and vegetable scraps for homemade broth.</li>
<li>Bake a full batch at once to make the most of your oven’s energy.</li>
<li>Compost parsley stems and onion trimmings whenever possible.</li>
</ul>
<h2 style=”color: #d33;”>Pairing Suggestions</h2>
<ul>
<li><strong>Beverages:</strong> Iced tea, sparkling lemonade, cola, mango juice, or a refreshing citrus soda complement the creamy, spicy filling perfectly.</li>
<li><strong>Sides & Sauces:</strong> Garlic fries, potato wedges, Caesar salad, ranch dressing, spicy mayo, extra sweet chili sauce, or creamy coleslaw complete the meal.</li>
</ul>
<h2 style=”color: #d33;”>Frequently Asked Questions</h2>
<ol>
<li><strong>Can I use store-bought pizza dough?</strong><br>
Yes! Store-bought pizza or bread dough works well when you’re short on time.</li>
<li><strong>Can I make these buns less spicy?</strong><br>
Absolutely. Simply reduce or omit the Sriracha and use only sweet chili sauce for a milder filling.</li>
<li><strong>Can I air fry these buns?</strong><br>
Yes. Air fry at 350°F (175°C) for about 10–12 minutes, depending on the size of the buns.</li>
<li><strong>Can I prepare the filling ahead of time?</strong><br>
Definitely! The filling can be refrigerated for up to two days before assembling the buns.</li>
</ol>
<h2 style=”color: #d33;”>Call to Action</h2>
<p>I hope these Cheesy Dynamite Chicken Buns become one of your favorite homemade comfort foods. They’re fluffy, cheesy, creamy, and packed with bold flavor in every bite. Whether you’re baking them for lunch, dinner, parties, or meal prep, they’re guaranteed to impress family and friends.</p>
<p>If you try this recipe, I’d love to hear how you made it your own! Did you add jalapeños, swap the cheese, or make them extra spicy? Leave a comment below, share your favorite variations, and don’t forget to post a photo on social media. Your homemade creations inspire fellow food lovers every day!</p>
<h2 style=”color: #d33;”>Bonus: Your Kitchen Notes</h2>
<p>Every stuffed bun recipe becomes even better with a few personal touches. Use this section in your WordPress editor to record your favorite cheese blend, spice level, bread dough adjustments, or serving ideas. Maybe your family loved adding crispy bacon, roasted peppers, or serving the buns with garlic butter for dipping. These notes will help you recreate your perfect Cheesy Dynamite Chicken Buns every time while inspiring your readers to create their own delicious version.</p>